
Security
To manage system-wide security settings, select System Settings > Security.
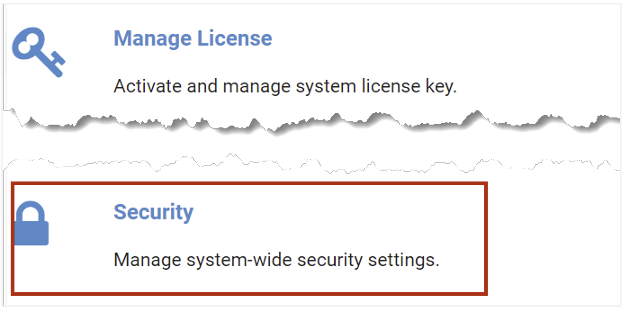
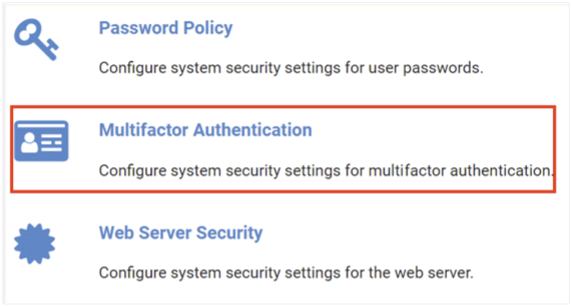
Security options shown include Password Policy, Multifactor Authentication, and Web Server Security. We will explore these in the subsections below.
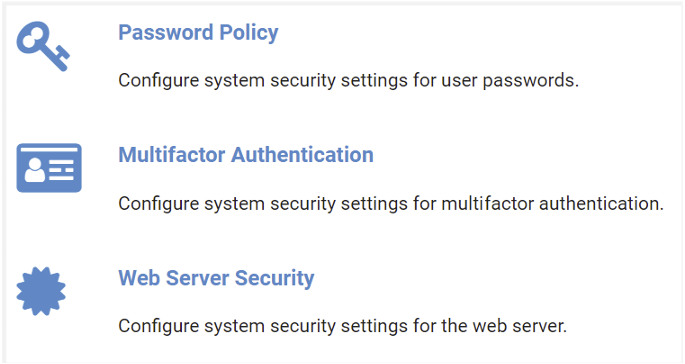
Password Policy
You may customize the password policy settings to meet the requirements of your organization. Follow the steps below to view and edit the settings.
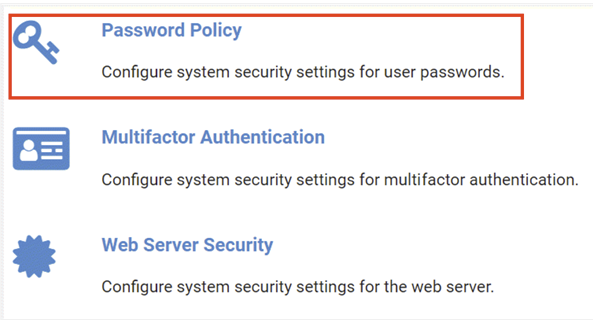
From the Security page, select Password Policy.
The Password Policy page will be displayed. To edit the settings, select Edit.
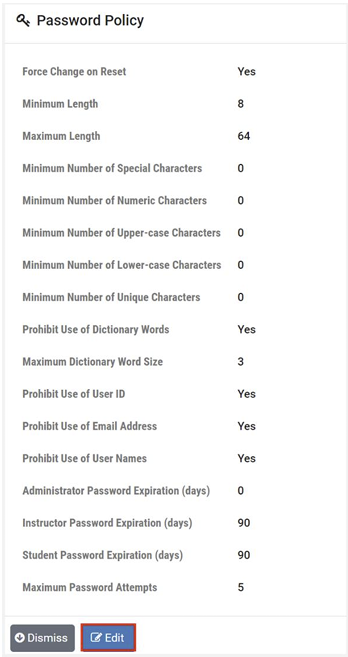
The Edit Password settings page is shown. See the field descriptions below for guidance on making your selections for these settings, and then click Submit.
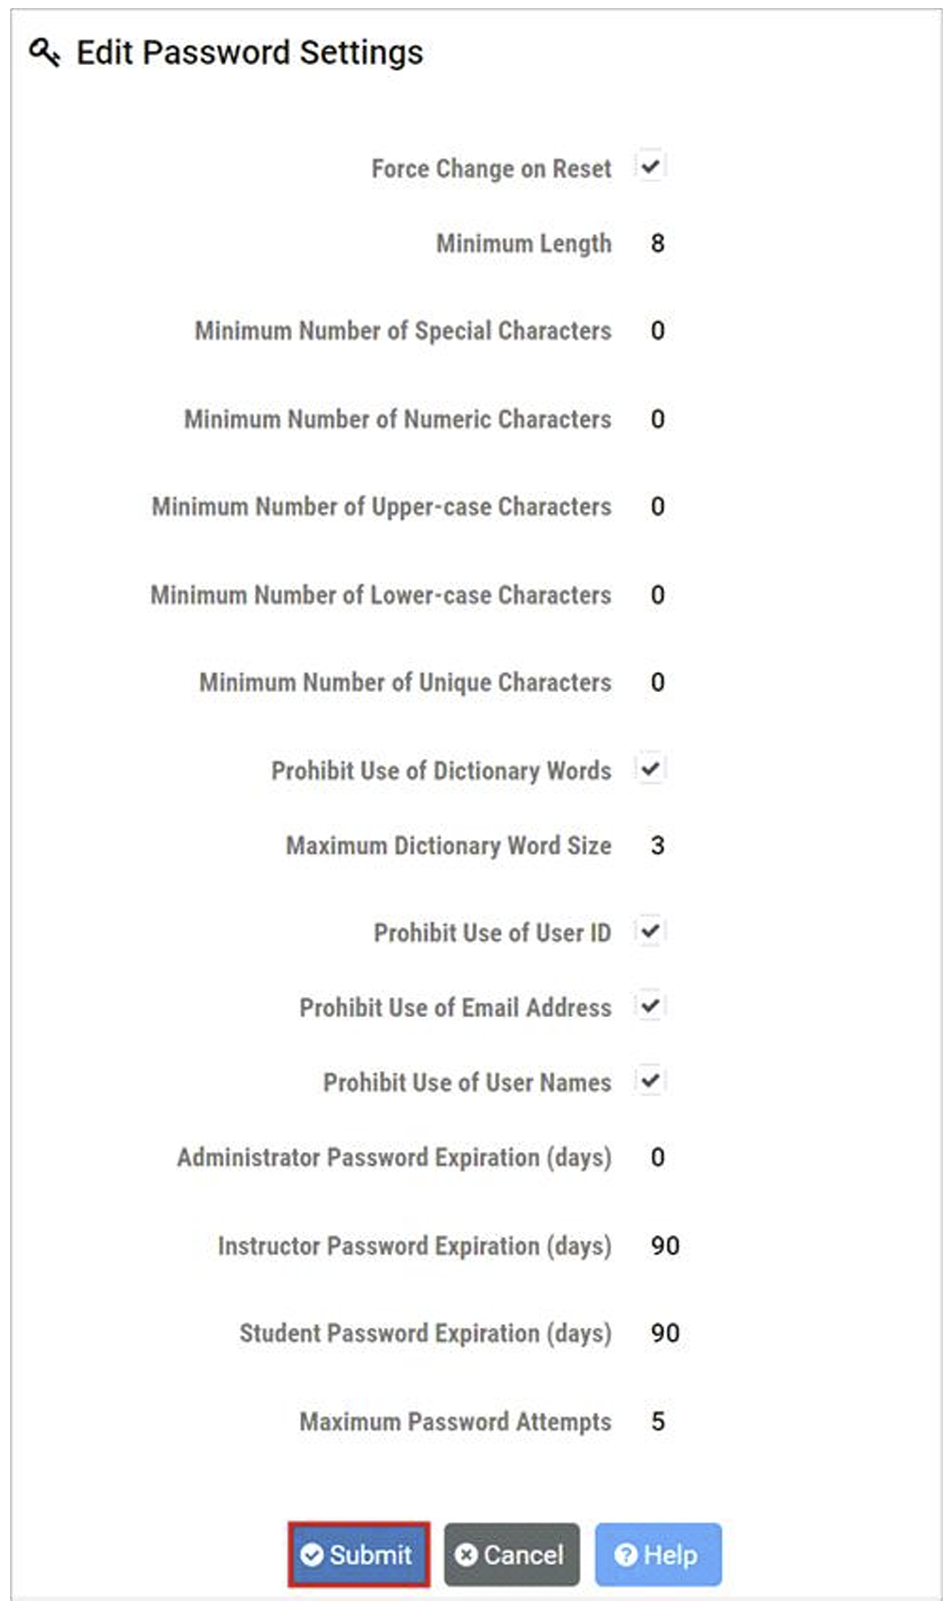
Field Descriptions - Edit Password Settings
- Force Change on Reset:
If true (checked), users will be required to CHANGE their password upon their next login, after it has been set/reset by another user (such as the administrator or lead instructor). This value is true by default, and changing it should be avoided if at all possible.
- Minimum Length:
The minimum number of characters required in a valid password.
- Minimum Number of Special Characters:
The minimum number of special characters required in a valid password.
- Minimum Number of Numeric Characters:
The minimum number of numeric characters required in a valid password.
- Minimum Number of Upper-case Characters:
The minimum number of uppercase characters required in a valid password.
- Minimum Number of Lower-case Characters:
The minimum number of lowercase characters required in a valid password.
- Minimum Number of Unique Characters:
The minimum number of unique characters required in a valid password.
- Prohibit Use of Dictionary Words:
If true (checked), valid user passwords may not contain any common English dictionary words with a number of characters more than or equal to the value specified for Maximum Dictionary Word Size.
- Maximum Dictionary Word Size:
The maximum size, in characters, of common English dictionary words that a valid password may contain.
- Prohibit Use of User ID:
If true (checked), valid user passwords may not contain the user’s ID.
- Prohibit Use of Email Address:
If true (checked), valid user passwords may not contain the user’s email address.
- Prohibit Use of User Names:
If true (checked), valid user passwords may not contain any of the user’s names.
- Administrator Password Expiration (days):
The number of days an administrator account password can exist before it must be changed. A value of 0 disables the expiration of administrator passwords.
- Instructor Password Expiration (days):
The number of days an instructor account password can exist before it must be changed. A value of 0 disables the expiration of instructor passwords.
- Student Password Expiration (days):
The number of days an student account password can exist before it must be changed. A value of 0 disables the expiration of student passwords.
- Maximum Password Attempts:
The maximum number of failed password attempts allowed before a user is locked out of their account.
Multifactor Authentication
NETLAB+ supports multifactor authentication (MFA). MFA requirements are set through the NETLAB+ administrator interface for the administrator, instructors, and students. In this section, we will show how to configure system security settings for multifactor authentication.
From the Security page, select Multifactor Authentication.
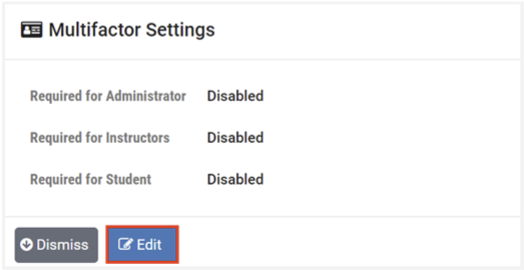
The Multifactor Settings page will be displayed; select Edit to modify the settings.
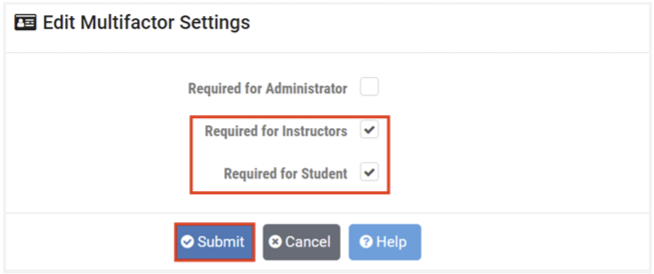
On the Edit Multifactor Settings page, select the checkbox(es) for which MFA requirements will be applied
and then press Submit. In the example below, MFA will be required for students and instructors but
not for the administrator.
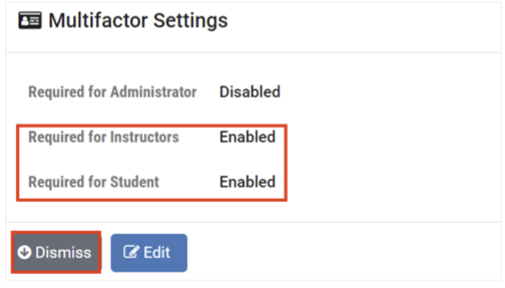
The Multifactor Settings page now shows that multifactor authentication requirements are enabled for
instructors and students. Click Dismiss.
Web Server Security
To configure the web server security settings, select Security > Web Server Security.
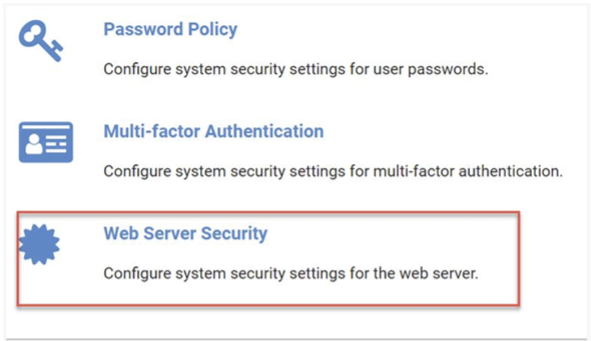
The web server security options include Strict Transport Security (HSTS) and Cross Site Request Forgery (CSRF) Protection. We will describe these options in the subsections below.
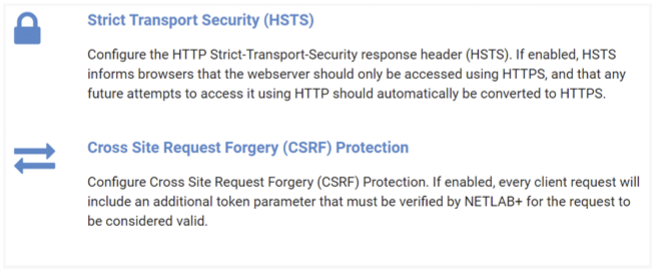
Strict Transport Security (HSTS)
Follow the steps below to configure Cross Site Request Forgery (CSRF) Protection. If enabled, every client request will include an additional token parameter that must be verified by NETLAB+ for the request to be considered valid.
Go to Security > Web Server Security.
Select Strict Transport Security (HSTS) to configure the HTTP Strict-TransportSecurity
response header (HSTS).
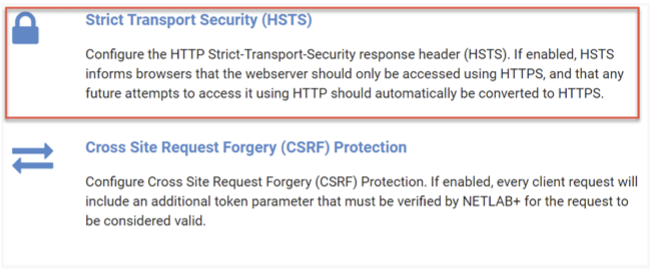
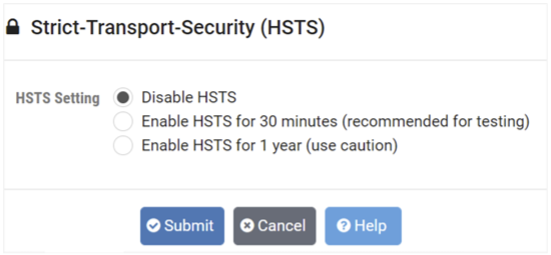
The Strict-Transport-Security (HSTS) page will be displayed, allowing you to enable/disable HSTS.
Note
If enabled, HTTP Strict-Transport-Security response header (HSTS) informs browsers that the site should only be accessed using HTTPS, and that any future attempts to access it using HTTP should automatically be converted to HTTPS. Please refer to the subsection below for a detailed description of HSTS.
Warning
If your SSL certificate becomes invalid (including Let’s Encrypt), HSTS can lock users out of the web interface, including the administrator.
If HSTS is enabled, the administrator must be vigilant in maintaining a valid SSL certificate at all times.
A menu option in the virtual machine system console is provided to disable HSTS if the administrator becomes locked
out of the web interface (see Recover from HSTS Lockout).
Overview of HSTS
HTTP Strict Transport Security (HSTS) is a policy mechanism that helps to protect websites against man-in-the-middle attacks such as protocol downgrade attacks and cookie hijacking. It allows web servers to declare that web browsers (or other complying user agents) should automatically interact with it using only HTTPS connections, which provide Transport Layer Security (TLS/SSL), unlike the insecure HTTP used alone. The HSTS Policy is communicated by the server to the user agent via an HTTP response header field named “Strict-Transport-Security”. HSTS Policy specifies a period of time during which the user agent should only access the server in a secure fashion. Websites using HSTS often do not accept clear text HTTP, either by rejecting connections over HTTP or systematically redirecting users to HTTPS (though this is not required by the specification).
The protection only applies after a user has visited the site at least once, relying on the principle of Trust on first use. The way this protection works is that a user entering or selecting a URL to the site that specifies HTTP, will automatically upgrade to HTTPS, without making an HTTP request, which prevents the HTTP man-in-the-middle attack from occurring.
NETLAB+ automatically forwards HTTP requests on port 80 to HTTPS on port 443 (except for Let’s Encrypt verification requests), so it is not technically necessary to enable HSTS. However, many security reporting tools will complain if HSTS is not enabled.
Enable HSTS
If enabled, HSTS informs browsers that the web server should only be accessed using HTTPS, and that any future attempts to access it using HTTP should automatically be converted to HTTPS.
On the Strict-Transport-Security (HSTS) page, select the option to Enable HSTS for 30 minutes.
Warning
Choosing the 30-minute option initially is recommended, as it will allow you time to test access to your NETLAB+ system and ensure the setting yielded desirable results, while alleviating concerns of getting locked out of the system.
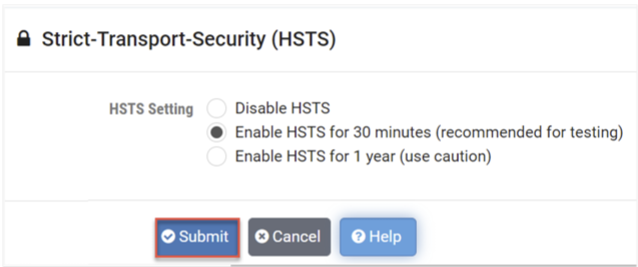
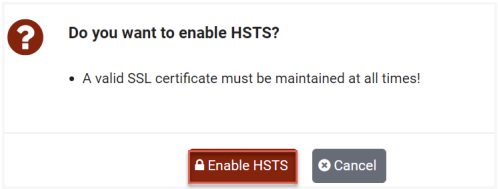
Click the button to confirm that you want to Enable HSTS.
Warning
NETLAB+ will refuse to enable HSTS if the active SSL certificate is not valid, as this would surely lead to lockout from the web interface. This includes the default self-signed SSL certificate or any expired SSL certificate.
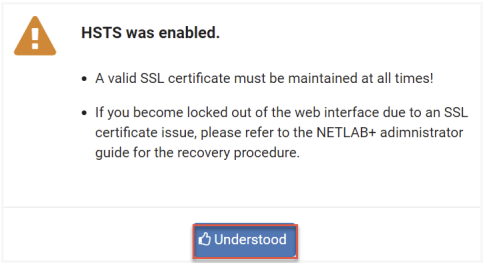
Click Understood.
After testing, you may, at your discretion, follow these steps once again, this
time choosing the option to Enable HSTS for one year.
HSTS Lockout
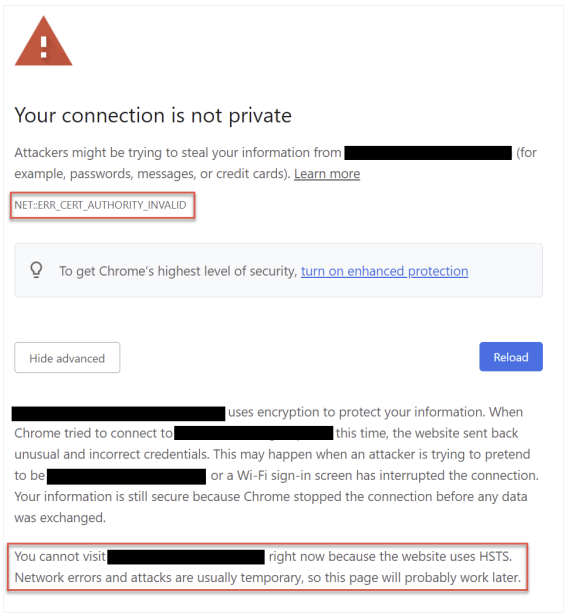
If your SSL certificate becomes invalid while HSTS is enabled, users may become locked out of the NETLAB+ web interface with an error message from the browser, similar to the image below. This includes the administrator!
Note
See the next section for instructions on recovering from HSTS lockout.
To prevent this situation, the administrator must be vigilant in maintaining a valid SSL certificate at all times, even if using Let’s Encrypt. The expiration date of your active SSL certificate is displayed on the administrator home page. Always renew your certificates well in advance of the expiration date. If using Let’s Encrypt, the certificate should autorenew about 60 days prior to expiration.
Recover from HSTS Lockout
The following steps can be taken to resolve HSTS lockout. The steps in the example below were performed using Google Chrome; the appearance on your system may vary depending on your choice of web browser.
Log in to the virtual machine system console.
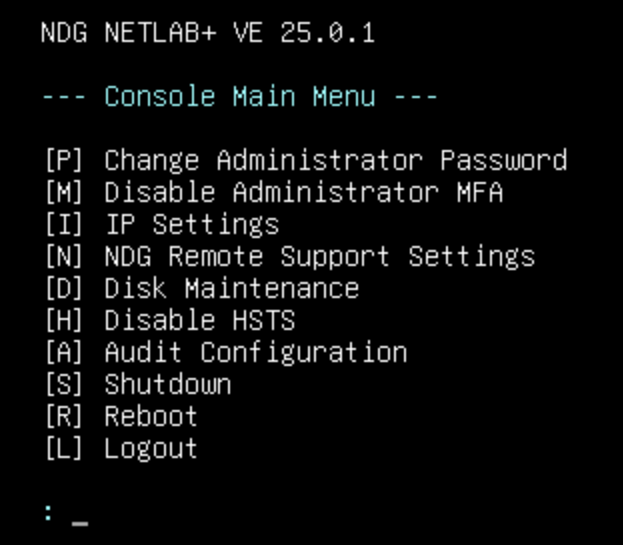
Choose menu option [H] Disable HSTS.
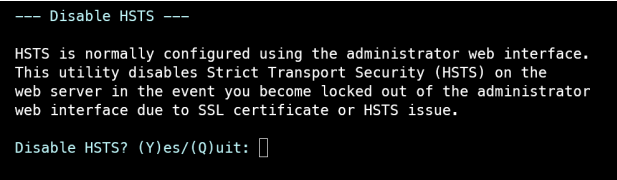
Respond to the prompt by entering Y to disable HSTS.
Open a Private Browsing window or tab (a.k.a. Incognito Mode).
Attempt to access your NETLAB+ system. You should see the Your connection is not private dialog.
Click the Advanced button.
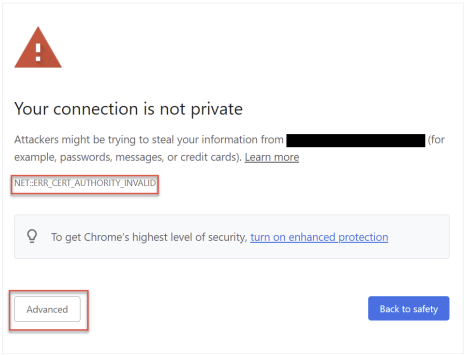
Click the Proceed to <website> (unsafe) link.
Warning
If you do not see the option to Proceed and instead see Cannot visit because HSTS is enabled, be sure you are using a Private Browsing session (per step 4). You can also try a different browser provided it has not received an HSTS header from the affected NETLAB+ system.
Log in to the NETLAB+ administrator account using the web interface.
Update your SSL certificate to a valid one and activate it (see SSL Configuration - Manage Certificates).
Verify that users are now able to log in.
Re-enable HSTS if desired.
Cross Site Request Forgery (CSRF) Protection
Follow the steps below to configure Cross Site Request Forgery (CSRF) Protection to help prevent attackers from highjacking users’ sessions and submitting service requests on their behalf.
If enabled, every client request will include an additional token parameter that must be verified by NETLAB+ for the request to be considered valid.
Go to Security > Web Server Security.
Select Cross Site Request Forgery (CSRF) Protection.
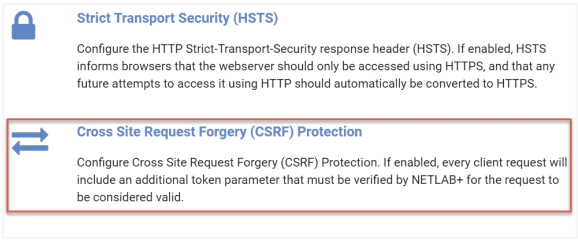
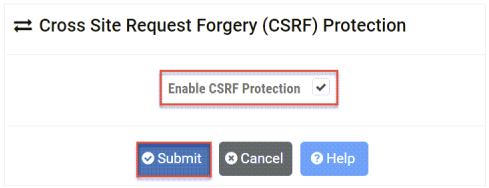
The CSRF page will be displayed. To Enable CSRF Protection, check the checkbox
and then click Submit.
Warning
Enabling CSRF protection has the potential to cause problems for some LMS users. These problems tend to present themselves more commonly when the LTI external tool is configured to open within an inline frame. Similarly, it is often possible to eliminate these problems by configuring the LTI external tool to open in a new tab or window. Please note that enabling CSRF protection from a disabled state may invalidate active sessions.
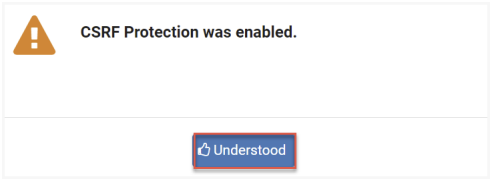
A message will display, confirming that CSRF was enabled. Click Understood.
Content Security Policy (CSP)
Content Security Policy (CSP) is a web server setting that restricts NETLAB+ to loading web resources from its own origin and controls which sites may embed NETLAB+ pages in a frame. This helps protect against cross-site scripting and clickjacking. CSP is disabled by default.
While CSP is enabled, only NETLAB+ itself may frame NETLAB+ pages. The exception
is the set of pages an LMS opens during an LTI launch or registration, and the
login and logout pages while a browser is in an LTI session. Which sites may
frame those pages is decided by the LTI frame-ancestors list. Its default,
*, permits any site, so an LMS works without further configuration, and it can
be narrowed to your own LMS. See
Framing and Browser Cookies in the LMS
Integration guide for how these pages are framed.
As of version 25.3.1, the LTI frame-ancestors list can be reviewed and set on the CSP page. Earlier versions offered only the enable checkbox.
Go to Security > Web Server Security.
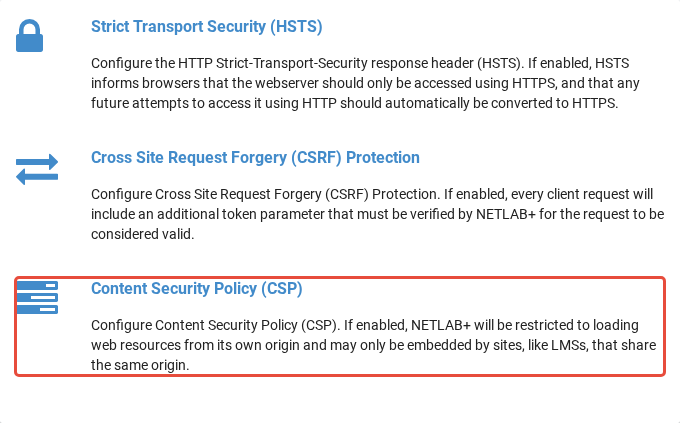
Select Content Security Policy (CSP).
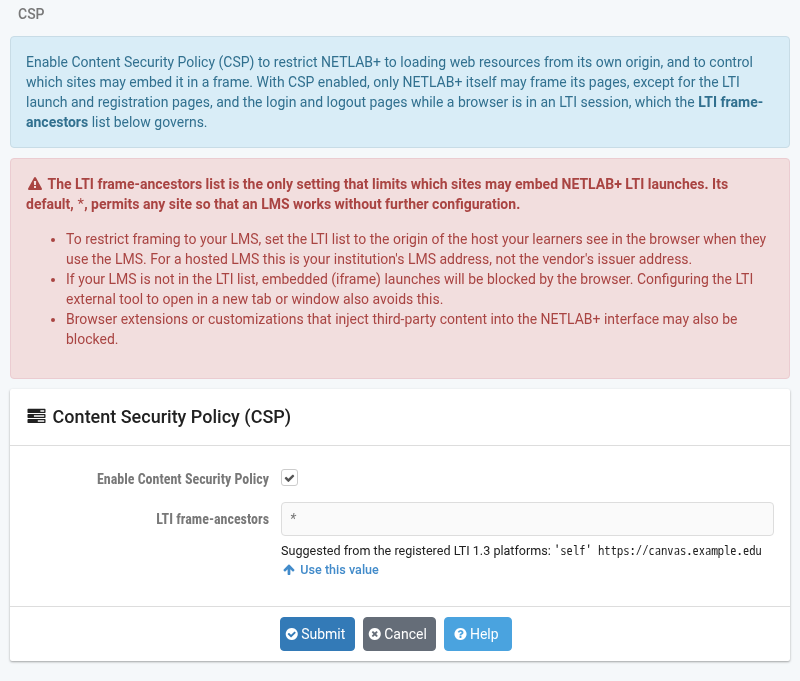
The CSP page will be displayed. To enable CSP, check the Enable Content Security Policy checkbox. Review or set the LTI frame-ancestors list, then click
Submit.
Field Descriptions
- Enable Content Security Policy:
Check the box to enable CSP or uncheck it to disable CSP. The LTI frame-ancestors list is saved either way, but takes effect only while CSP is enabled, so it can be prepared before CSP is turned on.
- LTI frame-ancestors:
Sites permitted to embed the LTI launch and registration pages, and the login and logout pages during an LTI session. Leave this blank to use the default,
*, which permits any site. To restrict framing to your LMS, enter the address learners see in the browser when they use the LMS, such ashttps://lms.example.edu. When LTI 1.3 platforms are registered, the page suggests a value built from them; clickUse this valueto copy it into the field.
The list is a space-separated set of origins, such as https://lms.example.edu,
or one of the keywords 'self', 'none' or *. A blank field uses the
default. Double quotes, backslashes and semicolons are not permitted.
Warning
The suggested value is taken from the address each registered platform sends browsers to. For a self-hosted LMS that is the LMS itself. For a hosted LMS it may be the vendor’s shared sign-on host rather than your institution’s own LMS address, so confirm the suggestion against the address in the browser before using it.
Warning
The LTI frame-ancestors list is the only setting that limits which sites may embed NETLAB+ LTI launches. If your LMS is not in the list, embedded (iframe) launches will be blocked by the browser. Configuring the LTI external tool to open in a new tab or window also avoids this. Browser extensions or customizations that inject third-party content into the NETLAB+ interface may also be blocked while CSP is enabled.
A message will display, confirming whether CSP is enabled and showing
the list in effect. Click Understood. The web server is
reloaded only when a setting changed.
To disable CSP, return to this page, uncheck Enable Content Security Policy, and then click Submit. The list is kept and applies
again when CSP is re-enabled.